Friday, November 13, 2009

Hissyfits Hullabaloo Weekend Fun


My first official craft fair was a huge success! I had a great time meeting with local men and women who have some amazing talent and incredible drive! Wow, I have to admit that I was a bit intimidated walking up to the place to find my spot and set up. These crafters were so innovative and unique and their workmanship was superb! A girl next to me (Sew Cute) was selling custom carseat covers for infant/toddler seats. They were made with two types of fabric: minky and then a fun patterned fabric. They were so amazing and she was getting orders NON-STOP because she sold them at such a resonable price -- $30!!! I mean, who has ever heard of a carseat cover of that quality being only $30!


My table was packed the entire day, partly because of being located next to carseat cover lady, but also because I put out a bunch of $1 and $2 bins with bows and flower clips for the kids to choose from. It was a hit and brought in the customers!!! Overall, I brought in about $200 at the end of the day.

I think that the success at this craft fair has opened my mind to doing more in the future. I got my cards out there and have already been asked to do a custom watch band for someone who saw me there. I hope this is the kickstart that I needed after feeling so disheartened over the past 2 weeks.

Tuesday, October 27, 2009

Find of the Week -- My Frugal Lifestyle

Sew Clever Quilts
I absolutely LOVE this website! I met the blog owner S. back in college when I was playing rugby for Idaho State. Never in a million years did I believe that either one of us would be the crafty stay at home mommies that we are today. Not even an exaggeration, really! She liked to party and I despised anything that made me feel too matronly! haha! Well, five years later and she is a successful crafter who sells beautiful Rag Quilts on ebay and runs her own Frugal blog. She is on to something, people, and I have personally used her ideas on how to use leftover lint, newspaper, how to make your own laundry detergent, and so many other cool posts. Check her out!!!

Thursday, October 22, 2009

Find of the Week -- Kyra's Corner


Are you looking for inexpensive, boutique-style flower barrettes for your hair without the boutique price? Look no further than Kyra's Corner. The owner and designer, we'll call her Mrs. Pink, uses this business as a way for her and her 4 year old daughter to connect on an artistic level and to create beautiful things that both a toddler and a woman would love to wear! In fact, you will find many designs that are soley designed by the wee Ms K.

Prices are extremely reasonable and I've bought quite a few for my little P and G and they are even more beautiful up close! Go check her out and find out why Kyra's Corner is this week's Find of the Week!!!

Saturday, October 17, 2009

Block Letter Decor

I have always loved to do projects with Modge Podge. It is quite possibly the funnest crafting essential anyone can have in their closet! There are so many ways to make an ordinary item become a lifetime treasure with just a bottle of Modge Podge and some beautiful paper, magazine cutouts, and even copies of your favorite pictures.


I was turned onto the Block Letters by a friend of mine who owns her own Nail Salon out of her home in Idaho. She has a different set of adorable letters for practically EVERY season and holiday! She started by taking a class at her local scrapbooking shop and from then on she was hooked! Now she just orders the kit with all the papers and embellishments she needs for that specific project... Above is the project she started me on last summer!

I may do my own tutorial at a later time, but for now here is a great one from Pepperblossom Decor. They used it for the Halloween Theme and it couldn't be any cuter!

From their blog:


Here is an awesome Halloween project that is fast and User friendly! Holiday decorations can get so expensive. This project can cost you around ten dollars and you have the satisfaction of making it yourself! So Go for it!

Materials Needed:

Letters B,O,O...(can be found at a Hobby Lobby, Michaels or most craft stores.)
3 Orange and 3 Black pieces of scrapbook paper(Prefferably some cute Halloween prints)

1. Modge Podge
2. Foam Application brushes
3. Black Paint
4. Sand Paper
5. Misc black and Orange ribbons
6. Scissors
7. Box Cutter Blade or Crafters blade(seen in picture for step needed)

Go HERE for the rest of the tutorial...

Thursday, October 15, 2009

Hissyfits Hullabaloo


If you live in the Phoenix area and are looking for a fun and trendy craft show to check out, then please do go to the Hissyfits Hullabaloo on November 8th! I am going to have a booth there and I have seen a taste of what the other crafters have to offer and you WON'T be disappointed! There are some amazing artists out there with very innovative techniques. Come see for yourself! Look for Phoenix Rose Boutique while you're there!

Hissyfits is a children's consignment shop that sells only the hippest clothing and brands. You'll find everything from Ralph Lauren to True Religion to Janie and Jack. They feature local artists handmade accessories right inside their store and have only the nicest used toys/strollers/cribs/etc. I LURVE this store!

Find it on the NW corner of Glendale/7th Street in Phoenix! Go NOW!!!

Tuesday, October 13, 2009

SPOOKY Treats and Tips


Alright, so I've been making yummy treats once a week with Sweet P. as an after-school activity for us to do together and a way to cut back the money that goes toward's Big D.'s daily sweet-tooth expenses. It has actually saved us a LOT of mulah and has been so much fun for us girls to do together. Even Little G. gets in on the fun by being our taste tester! She LURVES her cookies and brownies!

Anyway, I've been using super cheap mixes that are always on sale and the brownie mix is only .79 cents at FRY'S!

Follow the directions on the package of your chosen Cookie or Brownie Mix.

TIP #1: FOR COOKIES: Use room temperature butter, whether it's a stick or from the tub. Let it sit out for a few minutes before using, in order to make mixing your cookie dough a WHOLE lot easier! DO NOT MICROWAVE! Believe me, it messes up your cookies somehow, not sure the true reason why!

TIP#2: FOR COOKIES: Pour in your wet ingredients first, and then slowly add in the dry mix little by little. It will make the dough work so much better!

TIP#3: FOR COOKIES: If doing cutout sugar cookies, after working the dough thoroughly, I would put the cookie dough in a ziplock back and let it sit for at least 20 minutes. This will allow for your dough to roll out very nicely and for your cutouts to come apart with ease.

TIP#4: FOR COOKIES: I like to lay a mixture of flour and powdered sugar on the table where I will be rolling out my cookie dough. I then sprinkle it on top, as well, so that I have no trouble with the dough sticking to my rolling pin, and it gives the cookies a little extra sweetness after baking!

TIP#5: FOR COOKIES: For soft, yummy cookies, you want your cookie dough to be fairly thick after rolling it out. This will keep your baked cookies nice and chewy. If you accidently overbake those darned cookies, NEVER FEAR! I have a GREAT tip for you to get them to soften up even after they've gone crispy... My grandma taught me the trick! Place your cookies in an airtight container like tupperware (make sure if you have iced or frosted your cookies that you have let them sit for at least 4 hours before stacking them) and then place a piece of bread inside with them. Close your lid and after a couple of hours your cookies will already begin to soften and get yummy, chewy, and delicious, even if they were slightly burned. Just throw the bread right in there, THAT's IT!

For decorating those delicious treats, I prefer to use Icing because it has a smooth and professional look. My favorite is this Betty Crocker Cookie Icing. Also, it is great to invest in some Icing Writing tubes like these Make sure that you store the icing at room temperature. In fact, refer to the packaging of your particular icing and I'm sure it will suggest the same thing. You don't want icing to be cooled because then it won't run and spread the way that it is meant to.

NOW, for the BROWNIES!!! I went out and purchased a mini-cupcake tin just for this occasion. They are very handy to have no matter what, so I suggest going out and getting one! Especially if you have little ones around. They make great bite-sized treats, and we love bite-sized brownies!!! We also bought the mini-cupcake paper liners to keep from having burnt spots on our edges.

TIP#6: FOR BROWNIES: If pouring your brownies in a pan, try mixing little balls of sugar cookie dough in with it. I just rolled up little 1 inch round balls of dough and then smooshed it down inside the brownie batter so that it was covered and smooshed out like a flat quarter or disc. (sorry I don't have any pics, I may add some at a later time when I make these again) Although you typically bake cookie dough and brownie batter at different temperatures and different time limits, the dough will not burn when mixed in with the brownies. It makes such an awesome marbled brownie that is absolutely DELICIOUS -- and nutritious, right? ;)

Ice your brownies the same way you would ice your cookies, making sure that they are cooled completely beforehand.
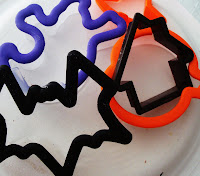
TIP #7: FOR BROWNIES: Another fun thing to try with your brownies is to cut out shapes with cookie cutters after they've been baked. What I did in order to not waste any of the brownie that was leftover after cutting out the shapes, was I made sure that I cooked the brownies until they were ALMOST done. The brownie cake needs to be solid, but still very soft, almost like your cookie dough would feel like when playing with it. I let the pan and brownies cool completely before dropping them out of the pan and onto some parchment paper or aluminum foil. Then, I cut out my shapes, place them on a cookie sheet, and any leftover brownie from the cutouts will be molded into one of the cookie cutters, just like you would do when cutting out cookie dough, only you don't use a rolling pin on brownies. You just mold. Rebake the brownies for about 5 or so minutes or until they look like they are crisping up on the outside and you're one! (wish I had some pics of the process).

Friday, October 9, 2009

Catch Phrase Slogan

I have been so busy trying to get my products perfected, my shop set up, and my business cards ordered that I just realized I forgot something very important. A slogan... something that is going to stick in someone's head and give them a snapshot of what I am all about. I've been racking my brain for days now and have only come up with things like, "incredible handmade accessories" or "fun and unique handmade goods"... LAME! LAME-E-ROONY! LAME-uh-ROOSO! However you state it, it's just lame! So, I need some great ideas from some great thinkers -- like YOU!!! Throw some out there and help me come up with the slogan that is gonna kick all other slogan's butts!